Featured in:
Two issues that often accompany a low back injury are tight hip flexors (specifically, the psoas) and weak glutes (your butt muscles).
Both of these issues need to be addressed, but not in the order that they often are.
Just because a muscle is tight doesn't mean it should be stretched immediately. The tightness is more likely to be a symptom of your back pain rather than its cause. If you want to become pain-free it makes more sense to try to determine what the cause of your back pain is and eliminate it instead of just treating the symptoms.
And while strengthening weak glutes is certainly a good idea, if you've injured your back it's usually wiser to improve the muscular endurance of the muscles that stabilise the spine first (more on that later).
First let's take a look at the psoas, and when it's a bad idea to stretch it:
The psoas is the main connector between your trunk and your legs. Its origin is the last vertebra of your thoracic spine (T12) and every vertebra of your lumbar spine (L1 to L5). It attaches to its insertion at the top of your femur (thigh bone). This makes it the main flexor of the hip joint.

However, the psoas isn't just a hip flexor. Its attachment points on your lumbar spine mean that it also functions as a stabiliser and erector of the spinal column.
If you suffer an injury to an intervertebral disc of your lumbar spine, the joint encompassing the disc can lose some stability as Professor Stuart McGill demonstrates in the video below.
As a result, your psoas may increase its role as a spine-stabiliser by stiffening up to prevent any micro-movements that could trigger your pain and/or worsen your injury.
This is a clever, short-term, protective strategy that your brain applies below the level of consciousness in order to prevent further injury.
Resist the urge to stretch your psoas (for now)
Given that your psoas has tightened up to provide your spine with protective stiffness, now is not the time to stretch it.
In any case, your psoas is unlikely to comply with your demands to stretch it because your unconscious brain (who instructed it to stiffen up in the first place) is smart enough to know that this is a bad idea at the moment.
Instead of treating the symptoms (in this case, tight hips), it makes more sense to first try to identify your individual pain triggers and the probable cause of your pain.
This is done via an in-depth interview and a bio-mechanical movement assessment that involves the deliberate provocation of your pain triggers.
If your assessment reveals, for example, that you're flexion-intolerant and/or extension-intolerant, then you first need to avoid these movements to allow your pain to desensitise and your back to heal.
This will require:
The abdominal brace is a movement tool used to eliminate any micro-movements that could trigger your pain or make your back injury worse. It utilises your 'core' muscles to stabilise your spine allowing you to move more freely through your hips and shoulders.
As you can see in the image below, the muscles that cover the largest area of the circumference of your trunk are the internal obliques, the external obliques and the transverse abdominus which are all layered on top of one another.

The fibres of these muscles run in different directions, in a similar way to how the fibres in the different layers of plywood run perpendicular to one other. This is what gives plywood its extra strength.

So, when you contract these muscles at the same time they provide an extra-strong belt of support around your trunk which stabilises your spine.
The most effective way to do this is by consciously activating an 'abdominal brace', as demonstrated in the video below.
This is a technique that powerlifters use to provide maximum stability to their spines while deadlifting or squatting heavy weights. It's also a technique that you can use to perform any movement where you need to control your posture to avoid triggering your back pain.
The key is to tune the stiffness of the brace to the task.
If you're going to pick up a cushion from the sofa your veins shouldn't start popping out of your head because you're bracing your abs as hard as you can.

Too much stiffness will create unnecessary compression of your spine. It will also use up valuable capacity that you should save for performing other tasks that require it such as lifting heavier objects.
You just need to create enough stiffness to be able to maintain a pain-free posture.
The Pec /Lat Brace
For some people, the abdominal brace creates pain in the lumbar spine due to the amount of compression it exerts on the vertebrae and the discs. If this is the case, you can use a pec/lat brace instead. This provides additional stability to your spine without compressing it to the same degree as an abdominal brace.
I believe that if we all learned to hip hinge at school there would be a lot less back pain in the world. It's a fundamental movement pattern that spares the spine and transfers the bulk of any load to the hip, a ball and socket joint designed (or, better said, evolved) to transfer force.
It's a simple movement pattern, but very few people perform it correctly if they haven't been coached before.
First you need your spine in a 'neutral' position and your abdominal brace activated to stabilise your spine. Then you can create movement through your hips, instead of your spine, as in the video below.
The hip hinge is the core movement pattern of the deadlift and can be applied to everything from cleaning your teeth to picking up groceries to lifting up your kids, allowing you to maintain a pain-free, spine-sparing posture while doing so.
If your 'core' muscles aren't sufficiently trained then they can't protect the vertebral articulations that depend on their support. This means that the soft tissues in your spine such as the ligaments and discs will be subjected to greater stresses which can result in pain and/or injury.
However, if you improve the muscular endurance of the 'core' muscles that stabilise your spine, you'll be able to maintain pain-free postures throughout the day which will allow your injured tissues to heal.
The 'core' exercises that have been shown to provide maximum training stimulus to the muscles of your torso whilst causing minimum stress to your spine are the McGill 'Big 3': the birddog, the side plank and the curl-up.
There are several progressions and regressions of each exercise. The appropriate version should be chosen and dosed according to your individual capabilities. These are the standard versions of each exercise:
The Bird-Dog
The Side Plank
The Curl-Up
Once you've built sufficient muscular endurance by performing these exercises daily, your psoas will no longer be depended upon to the same extent to stabilise your spine.
Now's the time to start mobilising your hips.
Tightness in your psoas may restrict the range of movement in your hip joint which can have the unwanted effect of transferring more motion to your spine. This can make it harder for you to avoid your pain triggers and slow down the recovery of your injured back.
Christian, pictured below, used the psoas mobilisation exercises that follow to improve his mobility significantly. Before doing the exercises he was unable to perform a glute bridge without pain in his back. After only two sessions of psoas mobilisation he was able to perform the bridge pain-free, with a full range of motion.

Self-myofascial release with a yoga ball
Before stretching your psoas, it can help to try to release any trigger points in the muscle with a yoga ball.
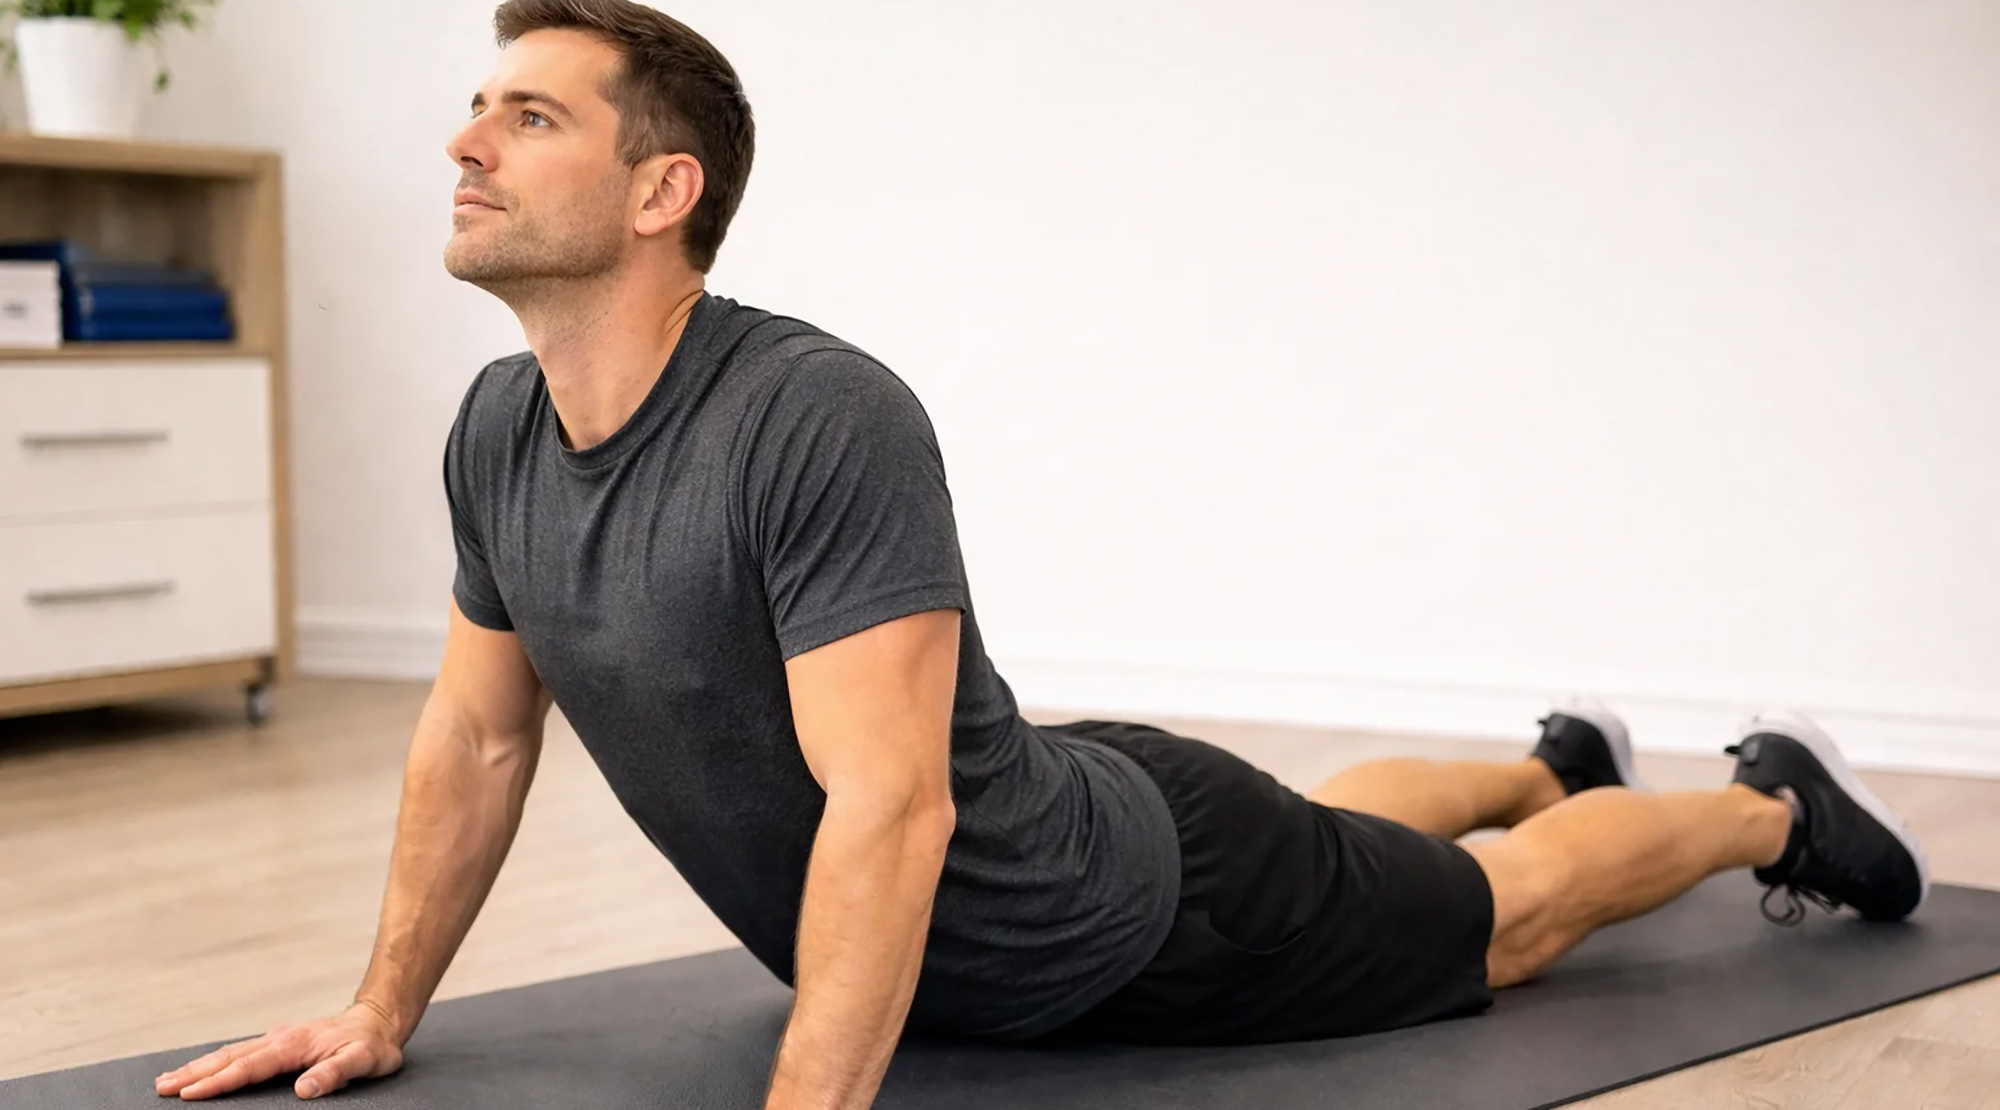
The standing psoas stretch
The standing psoas stretch is more effective for stretching the psoas than the commonly used, half-kneeling stretch which is actually better at targeting the iliacus, the muscle adjacent to the psoas.
The iliacus is also a hip flexor but it doesn't attach to the lumbar vertebrae as the psoas does. It therefore doesn't directly affect your spine in the same way.
Another disadvantage of the half-kneeling stretch is that it can place excessive stress on the hip capsule (a strong, protective seal comprised of ligaments that encases the hip joint) which you shouldn't stretch unless your goal is to make your hip joint less stable (not a good idea).
Now we can focus our attention on your glutes.
Your glutes are the biggest, strongest muscles in your body. They provide you with the power you need to extend your hips during running, jumping, squatting and lunging.
However, to generate their full power output your brain needs to perceive that it's safe to do so. If it detects instability, then it will reduce the power it allocates to them via neurological inhibition.
That's why it's a dumb idea to do squats while standing on a Bosu ball if your goal is to build strength or hypertrophy (your brain is instinctively smarter than the people you see on YouTube doing that).
For the same reason, if your brain detects instability in an injured or weakened spine it will down-regulate the force made available to the muscles that could inflict serious damage upon it.
Reducing power output is a clever way to protect your spine but it also results in your glutes becoming weaker. They're also likely to atrophy, becoming smaller if your injury is bad enough to put you out of action for more than a couple of weeks.
If you want to go back to being a fully functional, fit human being this weakness needs be addressed. But only after you've passed through the necessary preceding steps on your road to recovery:
Now you can start to strengthen your glutes with the following exercises (which, in addition, will continue to improve the mobility of your hips).
Clamshells
The Glute Bridge
Split Squats (for active mobility)
Mobilising your psoas using the techniques described earlier should give you some increased 'passive mobility'. This means that you can move your hip joint through an increased range of motion, passively (with little muscular control).
However, it's also important to develop 'active mobility'. This means having control of your hip muscles throughout their newly increased range of motion. Split squats are a good exercise to start increasing your control of this active range of motion.
Hip airplanes
The above exercises are a great way to begin strengthening your glutes whilst minimising the stress on your spine. These exercises can all be progressed before moving on to different variations of squats and deadlifts.
With enough patience and hard work, it's possible to become stronger and more resilient than you previously imagined, whilst maintaining a pain-free back.